Photo editing. It can be SUCH a touchy subject. To edit or not. I am one that has no problem in touching up a photo. I look at it like makeup. Trust me, you would rather I put makeup on than go out shopping and look like Shrek. I kind of feel the same way with photo editing.
But, just like makeup, you CAN over edit.

Yep, I had a problem with adding all kinds of filters to my pictures. I thought my pics were the bomb dot com too! I even had a really good friend tell me once that I should stop with the dark edges. She was crazy! Right? I used Orton and Lomo for EVERY SINGLE PICTURE. I thought I was rocking it!

One day I decided that my pics actually weren't that awesome. That maybe my friend was right. Plus, around that same time, she hosted a one day blogging boot camp with a local photographer who talked about editing. I heard her and the light went off! I not only changed the way I edit, but also the way I shoot my pics. Like I have mentioned before, I now use natural light. I shoot in the morning-early afternoon when the lighting is best in my house. I don't use flash.
There are two places I like to use to edit my pictures. They are both free programs. First is PicMonkey and the second is Picasa. I usually edit the photo in Picasa and then add labels and such in PicMonkey. I also use PicMonkey to make collages.

Today I am sharing how to use Picasa.
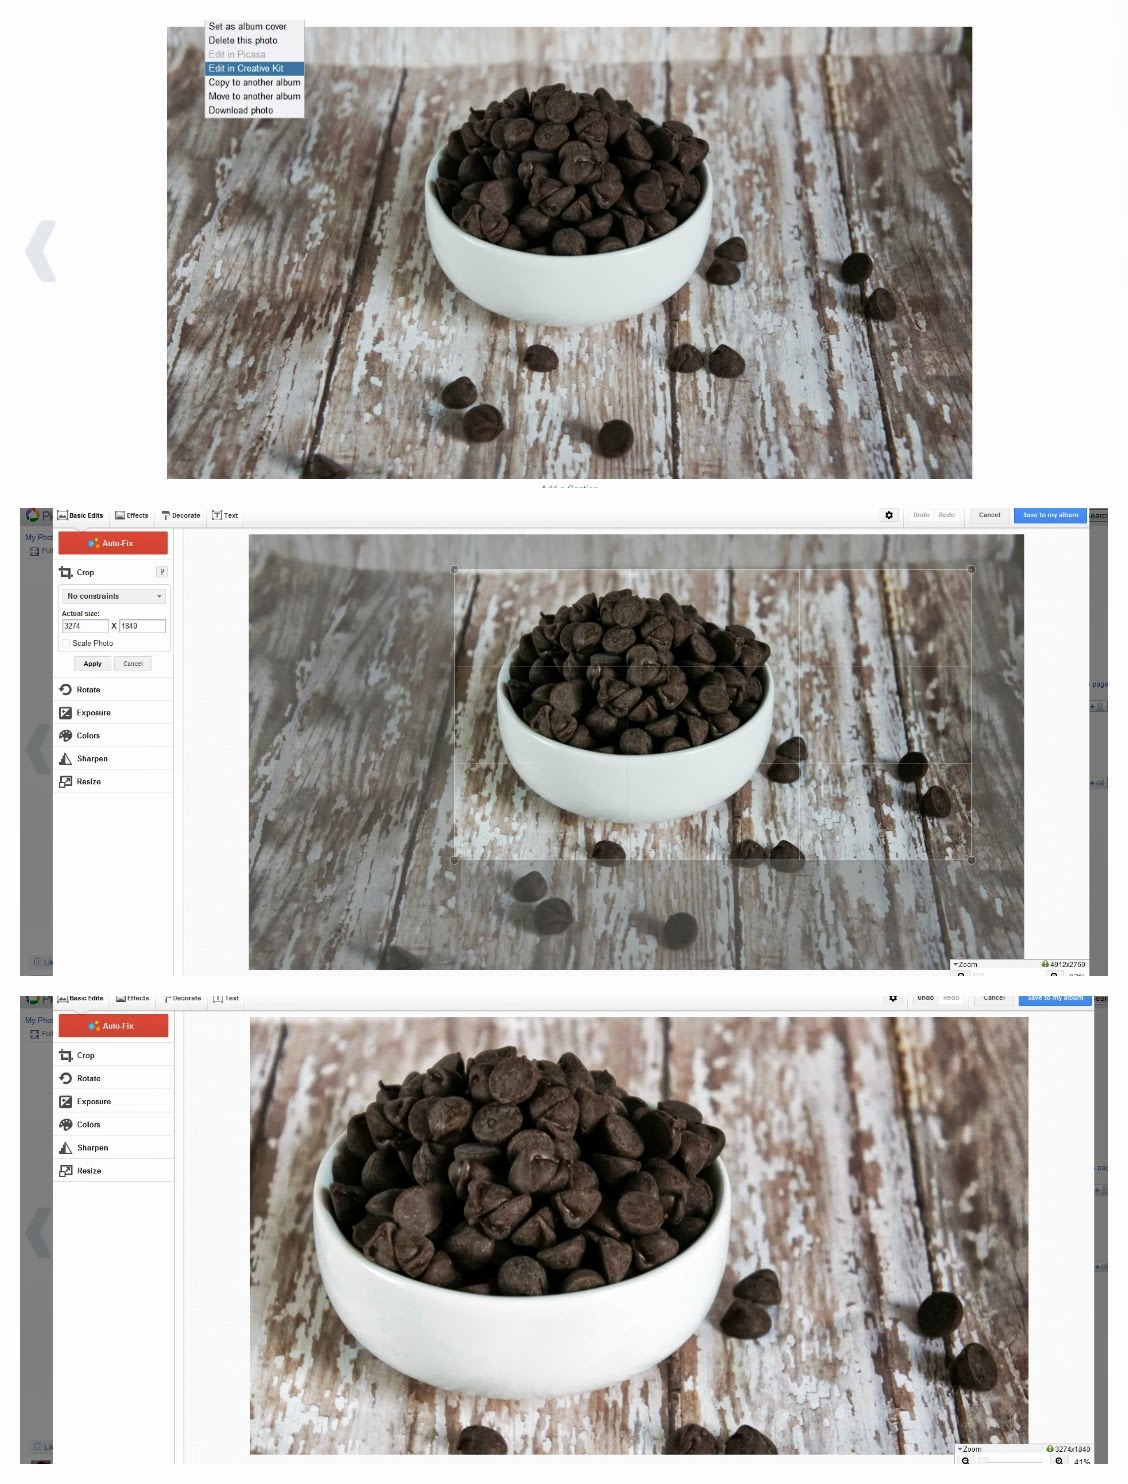
When you are in Picasa, click on the picture you want to edit. You will then click on 'Actions'. A drop down menu will appear, click on 'Edit in Creative Kit'. This will bring up a box with your picture in it along with options on how to edit. The first thing I do is click on 'Crop' the picture. Once I have cropped, I click on the orange box to 'Auto Fix'. sometimes the fix is exactly like I want it, other times it is WAY off. The 3rd pic is after I clicked on 'Auto Fix'. It looks pretty good, right?

If the 'Auto Fix' is off, just hit cancel and work with 'Exposure' and 'Colors'. Play around with each function in both of these options until you find what works best for your picture. Once I have the picture as I want it, I click on 'Sharpen'. In the 'Sharpen' box is 'Clarity', I usually stay between 3-10% with the clarity.

Once my picture is just how I want it, I add text. If I am going to go on to PicMonkey to add a ribbon and/or label, I just simply add my watermark (bottom pic). Just click on 'Text', type your message in the box and pic your font. When you are ready to add it to the picture, just click on 'Add'. You can move the text around, change the color, center it, fade it so it blends in with the background a bit and a few other things.

When you have it just as you want, click on save. That's it! If you are going on to use the picture in a Google+ album, you can just save it to that album in Picasa. Because we make a Google+ album with each shoppertunity we do in Social Fabric, I have found it easier to make it in Picasa then save it publicly on the web. This automatically saves it to your Google+ albums as well.
I am a bit sad this series is over, I have had a lot of fun with this. If you would like to check out the other weeks you can do so here:
Week 1 - Finding Your Inspiration
Week 2 - Telling Your Story
Week 3 - Getting Technical
Week 4 - Setup